
Tired of drowning in a sea of emails, struggling to organize your ideas, and wasting precious time transferring information between apps?
Meet Hitsnag, the game-changing tool that transforms your email into a powerful productivity hub.
🚀 Why Hitsnag?
1 Effortless Idea Capture: With Hitsnag, quickly jot down and organize invoices, client emails, support tickets, and ideas – all within your email.
2 Seamless Integration: Turn emails into actionable tasks on Trello, events in Notion, or documents in Google Docs, effortlessly streamlining your workflow.
3 Trusted Beta: Join 1,819 beta users who trust Hitsnag to enhance their productivity. Be part of a community shaping the future of this revolutionary tool.
🌐 Transform Your Inbox:
- Email to Support Ticket: Forward support tickets directly to Slack for your team’s visibility.
- On-the-Go Idea Capture: Save ideas from your email into Notion anytime, anywhere.
- Task Conversion: Turn emails into tasks and notify your team while creating Trello cards – all in a single email.
💡 Discover Snags – Your Secret Weapon:
- Snag Builder 🛠: Combine email with Notion, Trello, or any supported app effortlessly. Clean up the chaos before it happens.
- Universal Access: Send messages to Snags from any connected email address. Use Hitsnag seamlessly across devices – phone or laptop.
- Privacy Priority: Hitsnag ensures your data is secure with OAuth protocols, providing transparency in information usage.
- Time-Saving Magic: Guessing filenames? Hitsnag’s got you covered. Save time by organizing before the mess even begins.
🌐 How to Send Emails to Notion with Hitsnag
Step 1: Set Up Your Hitsnag Account
If you haven’t already, sign up for Hitsnag and ensure your account is connected to the email address you plan to use.
Step 2: Find Your Notion Snag Address
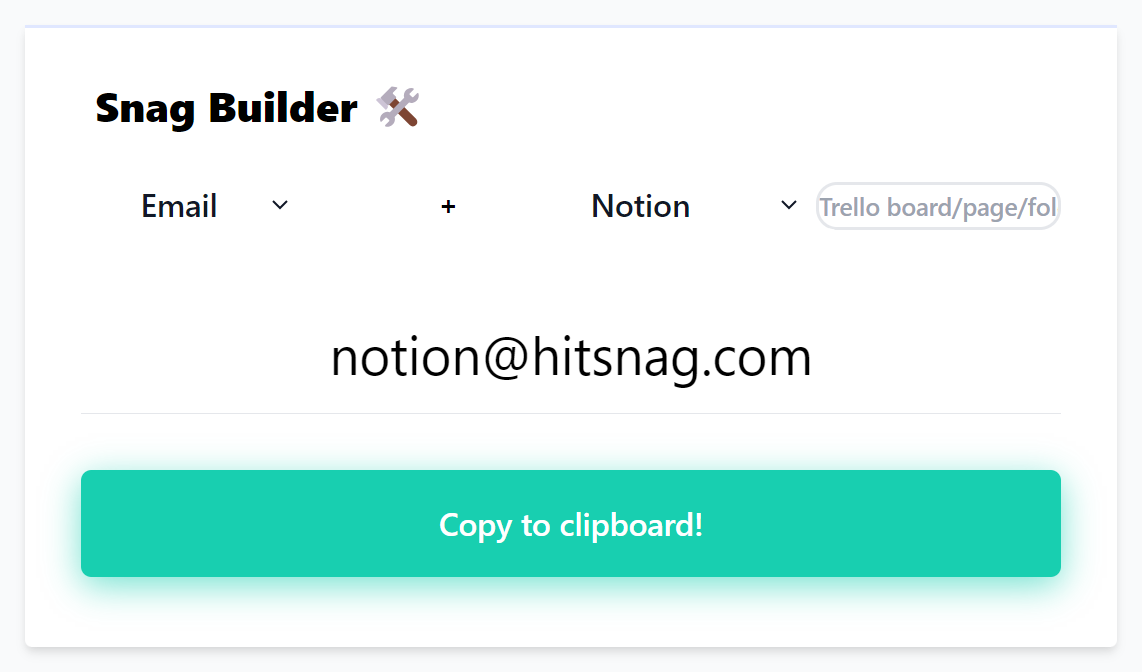
- In the “Snag Builder 🛠” section, locate the Snag Address for Notion. It will look something like notion+page-name@hitsnag.com.
- Copy this Snag Address to your clipboard; you’ll use it to send emails directly to Notion.
Step 3: Compose Your Email
- Open your email client and compose a new email.
- In the recipient field, paste the Snag Address you copied in Step 2.
- In the subject line, enter the desired name for your Notion page or task.
- In the body of the email, include any additional details or descriptions related to the page or task.
Step 4: Send Your Email
- Click ‘Send’ to dispatch your email to Hitsnag.
Step 5: Check Your Notion Workspace
- Head over to your Notion workspace and navigate to the specified page or task list.
- You’ll find the content of your email seamlessly integrated into Notion, organized exactly as you specified in the email.
Tips and Tricks for HitSnag:
- Page Naming: Use a hyphen as a space in the page name when composing the Snag Address. For example, if your page name is “Project Management,” the Snag Address would be notion+project-management@hitsnag.com.
- Formatting: Hitsnag intelligently preserves formatting, allowing you to use bold, italicize, underline, and add links within your emails, and all of these will be reflected in your Notion documents.
- Appending to Existing Pages: To add information to an existing Notion page, simply use the same Snag Address in the email and Hitsnag will append your new content.
🔗 Current Snags and Future Plans:
- They’re rapidly adding Snag shortcuts based on your feedback.
- Soon, Hitsnag will support apps like Slack, Evernote, Dropbox, iCloud, Drive, and Asana.
💸 Pricing
HitSnag is currently free of cost.
- They want your feedback and data to enhance Hitsnag for everyone.
Ready to revolutionize your productivity? Sign up for Hitsnag now and experience the future of email organization! 🥑✨